Create a blog

A Spark In The Dark
How do you create a blog? Well there are a lot of SaaS products in the market that will cater for that particular craving, like simply.com, wix, more. But what if you want to host it yourself, pick a template you just feel more comfortable with, and perhaps you even luster the challenge to like build the stuff?
I have been tinkering with a system for quite a while now and then the other day Ajs floated this idea: why not document the process [ed. like all the cool guys] ?
So - that is what this post is about: setup a blog and host it yourself.
Research
honeybadger.io using Jekyll is a very well written post on how to setup a
Jekyll based documentation system with great links to writing style guides and more.
evilmartians.com - I am
tempted to add “as usual” - outdid themselves again with a great piece on building software; this one is focused on building an API and doing so coming from the documentation side of things first, and it is a marvel! While I’m at it - don’t forget to give bump.sh a look see!
I was looking for something a little different though and so I started looking up the templates that comes with my subscription to tailwindui.com - sadly it’s all Next.js and I’m a Ruby guy.
It’s not like I don’t know how to read JavaScript but certainly am quite rusty at it! Anyways, I found it fairly easy to get started with.
Settled for syntax for my first test. npm install the README stated - but carefully left out

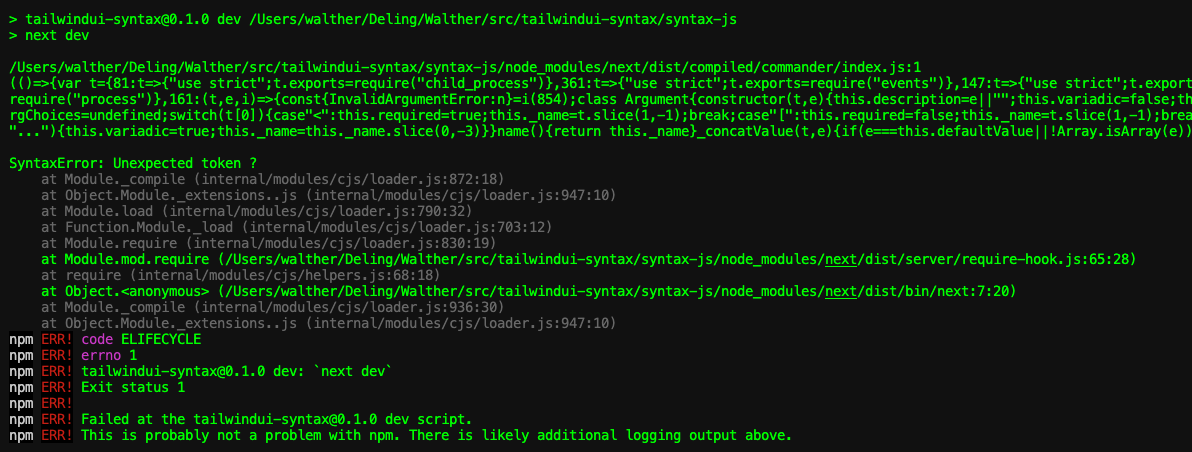
and when I tried my luck with npm run dev reality was swiftly dealing me the deciding blow

I knew I’d been slagging on the “keep your workbench clean AND fresh” - but there was help npm install -g npm.
Before, however, I embarked on that journey I did something else needing done: asdf list all nodejs and once realizing how much I was getting behind - I hurried to asdf install nodejs 22.7.0 closely followed by asdf local nodejs 22.7.0
It had a lot of what I was looking for but cut more towards documenting the features of the product than the process.
My second test used the spotlight template and I was very pleased with the result - so there you have it.
Implementation
I use Kamal to deploy Mortimer so I knew that was top of the list. We like the offerings from Hetzner and so I knew that would have to be part of the equation as well.
I will tell it straight as it is: I googled “deploy next with Kamal” and literally my
first hit was logsnag - sharing is wonderful, so thank you Shayan!
You can follow along here or jump to logsnag - the “story” is almost 1:1 - with me only transposing minor differences from a standard Next.js setup to the spotlight template.
1. Install Kamal
This one is easy - gem install kamal - and you’re done! I'd recommend you to check out the Kamal documentation. Having kamal installed already I was quickly moving forward.
2. Create a new project
This one was even easier - considering that I had already downloaded spotlight
All I had to do was
# cd ~/src
# mv ~/Downloads/spotlight .
# open spotlight.zip
# cd tailwindui-spotlight
# npm install
# cp .env.example .env.local
Following the README.md I edited the .env.local file.
3. Setting up health checks
I am not the TypeScript guy - but I know that it’s a good thing to have health checks, in fact Kamal requires it to be able to tell whether your app is booting correctly (and it has saved me on multiple occasions so I'm a fanboy).
Anyways, I mkdir app/up && touch app/up/route.js and added the following code to the route.js file:
export async function GET(req) {
  return new Response('Ok', { status: 200 });
}
4. Retrofitting a Dockerfile
First task was to add a single line to the next.config.mjs file output: 'standalone'
  import rehypePrism from '@mapbox/rehype-prism'
  import nextMDX from '@next/mdx'
  import remarkGfm from 'remark-gfm'

  /** @type {import('next').NextConfig} */
  const nextConfig = {
    pageExtensions: ['js', 'jsx', 'ts', 'tsx', 'mdx'],
    experimental: {
      outputFileTracingIncludes: {
        '/articles/*': ['./src/app/articles/**/*.mdx'],
      },
    },
    output: 'standalone'
  }

  const withMDX = nextMDX({
    extension: /\.mdx?$/,
    options: {
      remarkPlugins: [remarkGfm],
      rehypePlugins: [rehypePrism],
    },
  })

  export default withMDX(nextConfig)
Second, I added a .dockerignore file:
Dockerfile
.dockerignore
node_modules
npm-debug.log
README.md
.next
.git
.gitignore
And finally, the Dockerfile:
FROM node:20-alpine AS base

# Disabling Telemetry
ENV NEXT_TELEMETRY_DISABLED 1
RUN apk add --no-cache libc6-compat curl

FROM base AS deps
WORKDIR /app

COPY package.json package-lock.json ./
RUN npm ci

FROM base AS builder
WORKDIR /app
COPY --from=deps /app/node_modules ./node_modules
COPY . .

RUN npm run build

FROM base AS runner
WORKDIR /app

ENV NODE_ENV=production

RUN addgroup --system --gid 1001 nodejs
RUN adduser --system --uid 1001 nextjs

COPY --from=builder /app/public ./public
RUN mkdir .next
RUN chown nextjs:nodejs .next

COPY --from=builder --chown=nextjs:nodejs /app/.next/standalone ./
COPY --from=builder --chown=nextjs:nodejs /app/.next/static ./.next/static

USER nextjs

EXPOSE 3000

ENV PORT=3000
ENV HOSTNAME="0.0.0.0"

CMD ["node", "server.js"]
5. Building the Docker image
With all the pieces in place I was ready to build the Docker image, (and test it locally):
docker build -t mortimer-blog .
docker run -p 3000:3000 mortimer-blog
6. Preparing a VM on Hetzner
I mentioned earlier that we like Hetzner and so I went ahead and created a new VM (when Kamal 2.0 breaks featuring managing multiple apps I guess I’ll have to revisit this part - but that will be a post for another day).
Creating a new VM is easy - I went with
- Helsinki
- Ubuntu 24.04 image
- shared vCPU on Arm64
- 4GB of RAM
- public IPv4
We manage a few servers on Hetzner already so adding my SSH key and setting up proper firewalls was as easy as tapping the right boxes.
7. Setting up Kamal
This one is in fact important - if you don't get it right you'll be scratching your head for a while.
First there is the kamal init command - it will ask you a few questions and then create a kamal.yml file for you.
( But before you get to enjoy that - you will have to add ruby 3.2.2 to the .tool-versions file; if it's not in the root of your project you can add it with echo "ruby 3.2.2" >> .tool-versions )
Then edit the config/deploy.yml file to look like this:
# config/deploy.yml
# Name of your application. Used to uniquely configure containers.
service: app_name

# Name of the container image.
image: user_name/app_name

# where to build the image
builder:
  remote:
    arch: arm64
    host: ssh://root@1.2.3.4

# Deploy to these servers.
servers:
  - 1.2.3.4

# Credentials for your image host.
registry:
  username:
    - KAMAL_REGISTRY_USERNAME
  password:
    - KAMAL_REGISTRY_PASSWORD

port: 3000
- and do not forget to add an .env file to the root of your project with the following content:
# .env
KAMAL_REGISTRY_USERNAME=your-docker-hub-username
KAMAL_REGISTRY_PASSWORD=your-docker-hub-password
8. Deploying
If you stuck with me this far you are ready to deploy your app.
After all the setting up and configuring you can now run kamal setup and watch the magic happen.
Kamal will prepare the server (installing Docker if not there), build your Docker image, push it to your registry and then you can kamal deploy to deploy it to your server!
Should you end up with a Finished in 103.0 seconds you are good to go - and you can now visit your site at the IP address of your server.
9. A custom domain
While http://1.2.3.4 is nice and all - I wanted to use my domain. I use Cloudflare for all my DNS needs and so I added an A record pointing to the IP address of my server.
Because we run a staging server as well as the production server for Mortimer I added a CNAME record for blog.
Waiting for the DNS to propagate I was able to visit my site at mortimer.pro/blog - or so I thought!
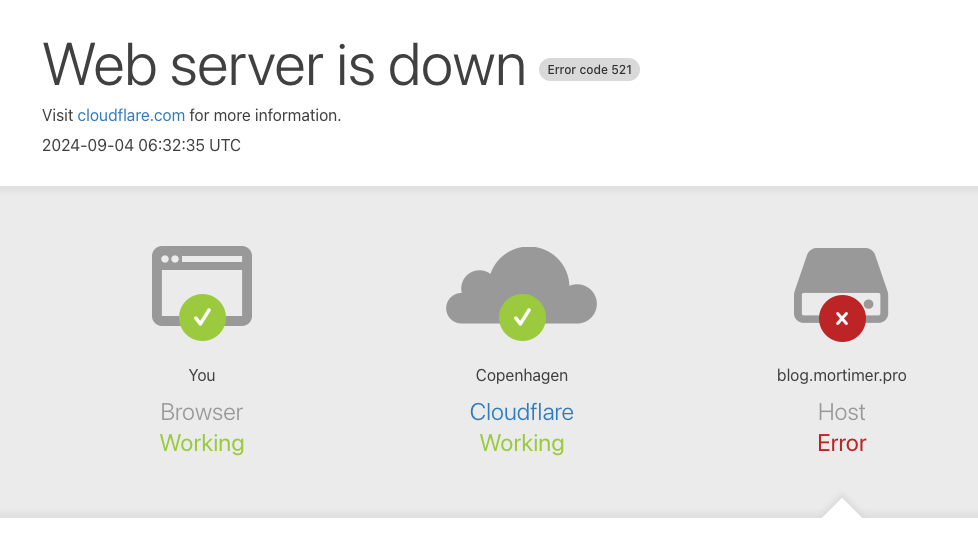
What I did in fact get was a 521 -

Then I remembered that I had to tell Traefik to listen for the https trafik - and so I changed the config/deploy.yml file:
# Name of your application. Used to uniquely configure containers.
service: app-name

# Name of the container image.
image: user_name/app-name

# where to build the image
builder:
  remote:
    arch: arm64
    host: ssh://root@1.2.3.4

# Deploy to these servers.
servers:
  web:
    hosts:
    - 1.2.3.4
    labels:
      traefik.enable: true
      traefik.http.routers.mortimer.entrypoints: websecure
      traefik.http.routers.mortimer.rule: Host(`blog.mortimer.pro`)
      traefik.http.routers.mortimer.tls.certresolver: letsencrypt
      traefik.http.routers.mortimer.tls.domains[0].main: blog.mortimer.pro
      traefik.http.routers.mortimer.tls.domains[0].sans: blog.mortimer.pro

traefik:
  options:
    publish:
      - "443:443"
    volume:
      - "/root/letsencrypt/acme.json:/letsencrypt/acme.json"

  args:
    api.dashboard: true
    log.level: INFO
    accesslog.format: json
    accesslog.filters.statusCodes: "400-599"
    accesslog.filters.retryAttempts: true
    accesslog.filters.minDuration: 101ms

    entryPoints.web.address: ":80"
    entryPoints.websecure.address: ":443"

    entryPoints.web.http.redirections.entryPoint.to: websecure
    entryPoints.web.http.redirections.entryPoint.scheme: https
    entryPoints.web.http.redirections.entrypoint.permanent: true

    certificatesResolvers.letsencrypt.acme.email: "walther@alco.dk"
    certificatesResolvers.letsencrypt.acme.storage: "/letsencrypt/acme.json"
    certificatesResolvers.letsencrypt.acme.httpchallenge: true
    certificatesResolvers.letsencrypt.acme.httpchallenge.entrypoint: web

# Credentials for your image host.
registry:
  username:
    - KAMAL_REGISTRY_USERNAME
  password:
    - KAMAL_REGISTRY_PASSWORD

port: 3000
10. Troubleshooting
I started pooking around and found that the ACME resolver "letsencrypt" is skipped from the resolvers list because:
kamal traefik reboot
kamal traefik logs -f
...
level=error msg="The ACME resolver \"letsencrypt\" is skipped from the resolvers list because: unable to get ACME account: permissions 755 for /letsencrypt/acme.json are too open, please use 600"
...
I changed the permissions on the acme.json file and rebooted Traefik:
rm -r /root/letsencrypt/acme.json
touch /root/letsencrypt/acme.json
chmod 600 /root/letsencrypt/acme.json
kamal traefik reboot
And now I was able to visit my site at mortimer.pro/blog - and so can you!
Oh, and btw: Mortimer is for real should an easy Time and Attendance SaaS solution come in handy ;)
